it's coming together

Show us pictures of your JD crawler and attachments.
Post Reply
gus
2010 crawler
2010 crawler
Posts: 723
Joined: Mon Jul 16, 2007 11:55 am
Location: North West
Contact:

it's coming together

Post by gus » Tue Dec 06, 2011 1:04 pm

I've taken a lot of photos along the way. It's all coming together.

I've been working on the photobucket acct and things got moved. How about we start at the beginning... I bought the tractor 5 yrs back and started working on it 3 yrs ago :P

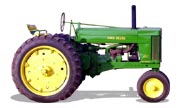
It got here looking like this:
Image

Then I removed some junk :lol:
Image

It had numerous problems, but this :roll: :roll:
Image

Digging into the problem??? :shock: :shock: :shock:
Image

Image

Image


Image


At this point, I got all the way through it to the shop floor...I figured not much left to take apart...3 yrs ago!! Wrong.... :roll: :roll:

I've found many thing to take apart and damn near every one required some work!!

But.. now it's going back together....if my memory doesn't fail me...

Everything was hauled to get sand blasted first (which showed up a couple of cracks that needed fixing) then painted.

Image

To the blaster... there's a whole crawler there minus the engine and tracks.
Image

Painting after blasting..
Image


Image

Image

Clean everything of rust and dirt then paint...even the rock guard cross bolts ...


Image

Image


The track frames were cleaned and straightened and painted. Many broken bolts...ran a tap through every hole when I got the damaged ones out. I was lucky, only those that I could reach both sides of needed to have nuts put on.

Image

Rollers cleaned and painted...

Image

Rock guards cleaned straightened and painted. I added a bolt at the front where most of the damage was. It appeared to be a weak spot??
Image

cross bars and side frames put on...
Image

And, I'll stop here this thing will take too long to load. I'll do a part 2 later just like Hollywood...
Last edited by gus on Thu Dec 08, 2011 12:08 pm, edited 3 times in total.

KenP
350 crawler
350 crawler
Posts: 824
Joined: Tue Aug 26, 2008 2:05 pm

Post by KenP » Tue Dec 06, 2011 2:06 pm

deleted
Last edited by KenP on Fri May 31, 2013 4:23 pm, edited 1 time in total.
No longer posting on JDCrawlers

gus
2010 crawler
2010 crawler
Posts: 723
Joined: Mon Jul 16, 2007 11:55 am
Location: North West
Contact:

Post by gus » Tue Dec 06, 2011 3:35 pm

KenP wrote:My compliments on your excellent work!
Looks like you have a nice shop to work in also.
Thank you. About the time I was headed to "semi retirement" we down sized the house and up sized the shop. I thought it was a fair trade :wink: :lol: :lol:

User avatar
Pammark
440 crawler
440 crawler
Posts: 195
Joined: Wed Jan 31, 2007 1:04 pm
Location: Marysville, Ohio

Post by Pammark » Wed Dec 07, 2011 10:07 am

Keep the pictures coming. I know from my posts, this group is hungry for pictures and appreciate all the input.

I see several shops larger than the house in the country. All I can say is; you can see where their priorities are.

Some day when I get the nice fancy shop, heated and cement floor; I will be too old and feeble to use it. That is my luck.

Mark
JD 2010 Crawler with Loader

gus
2010 crawler
2010 crawler
Posts: 723
Joined: Mon Jul 16, 2007 11:55 am
Location: North West
Contact:

Post by gus » Wed Dec 07, 2011 11:53 am

Pammark wrote:Keep the pictures coming. I know from my posts, this group is hungry for pictures and appreciate all the input.

I see several shops larger than the house in the country. All I can say is; you can see where their priorities are.

Some day when I get the nice fancy shop, heated and cement floor; I will be too old and feeble to use it. That is my luck.

Mark
Well, if there's interest, I can start from the begining and go from there with photos. It was taken apart about 3 yrs back and I'm just making time to finish it.

User avatar
440 iron popper
1010 crawler
1010 crawler
Posts: 273
Joined: Sun Sep 26, 2010 7:48 pm
Location: Québec, Canada

Post by 440 iron popper » Wed Dec 07, 2011 6:56 pm

[/quote]

Well, if there's interest, I can start from the begining and go from there with photos. It was taken apart about 3 yrs back and I'm just making time to finish it.[/quote]

Gus, post all pics you can!
440IC 1958 #443712, 602 blade, Gearmatic winch project in the back
440IC, serial tag gone, Blade with tilt
-------------------------------------------------------

gus
2010 crawler
2010 crawler
Posts: 723
Joined: Mon Jul 16, 2007 11:55 am
Location: North West
Contact:

Post by gus » Wed Dec 07, 2011 7:51 pm

I'm having issues with photobucket not uploading photos correctly (actually, not at all). I'll add part II when I can get this resolved.

User avatar
Willyr
2010 crawler
2010 crawler
Posts: 695
Joined: Sat Jul 17, 2010 3:03 am
Location: Downeast Maine (North of Ellsworth)

Post by Willyr » Thu Dec 08, 2011 7:02 am

If your using Mozilla with addon Adblock Plus, it may help to disable it
former owner of a 1956 420c
All help is greatly appreciated.

Proud owner of a project 1952 JD 60

http://www.youtube.com/watch?v=nFehqXVd9z4

gus
2010 crawler
2010 crawler
Posts: 723
Joined: Mon Jul 16, 2007 11:55 am
Location: North West
Contact:

Post by gus » Thu Dec 08, 2011 12:23 pm

At this point, I have a few comments and suggestions for those thinking about doing this. What you're digging into is 50++ yrs old and may not have ever been looked at since new.

Before reassembly:

Look into EVERYTHING (thank you for this, Lavoy, you saved my butt on a couple of things I wouldn't have done). I found some sort of problem in almost every assembly. Even if it didn't have a problem, It needed to be cleaned. I found dirt/sludge in everything or some times just hardened grease. Clean and relube everything.

I have replaced virtually all of the bolts (with the exception of the rock guard cross bolts) with new grade 8 bolts. Even those that do almost nothing like the bolts on the levers. Put never seize on the threads. All those springs are 50++ too.
All shafts should be cleaned and polished with emery and relubed as needed. Anything with threads should be cleaned and a chaser run on them if possible then lube/anti sieze as needed. Use new nuts and locks on the old parts.

User avatar
440 iron popper
1010 crawler
1010 crawler
Posts: 273
Joined: Sun Sep 26, 2010 7:48 pm
Location: Québec, Canada

Post by 440 iron popper » Thu Dec 08, 2011 4:05 pm

Very good pics! It's going to be ''factory'' condition. If you sell it one day, you'll deserve to say: It steers good and runs well :D :D
gus wrote:Use new nuts and locks on the old parts.
About those lock washers. The problem I found with them is that they often break, leaving a gap between the head of the bolt and the part it tries to hold tight. The bigger the bolt size, thicker is the lock washer and when it breaks the bolt becomes like unscrewed by a few threads... Have enough lock washers that break on a major component (like transmission to reverser) and the tractor could act like a door hinge. I rather prefer some loctite with a flat washer or locknuts.

I hope I'll post nice pics like yours soon instead of broken parts pics!!! :)

Nice work.
440IC 1958 #443712, 602 blade, Gearmatic winch project in the back
440IC, serial tag gone, Blade with tilt
-------------------------------------------------------

User avatar
Tigerhaze
350 crawler
350 crawler
Posts: 2278
Joined: Thu Jul 06, 2006 12:13 pm
Location: West-Central MO

Post by Tigerhaze » Thu Dec 08, 2011 4:33 pm

This was a pretty good discussion about the use of toique washers over lock washers on bolts with high torque values- also a discussion about bolt grades:

http://www.jdcrawlers.com/messageboard/ ... ock+washer
(1) JD Straight 450 crawler dozer with manual outside blade; (2) JD 2010 diesel crawler loaders; (1) JD 2010 diesel dozer with hydraulic 6-way blade; (2) Model 50 backhoe attachments, misc. other construction equipment

whiteclipse16
2010 crawler
2010 crawler
Posts: 626
Joined: Tue Mar 30, 2010 8:02 am
Location: Steubenville, OH

Post by whiteclipse16 » Fri Dec 09, 2011 7:41 am

gus wrote:At this point, I have a few comments and suggestions for those thinking about doing this. What you're digging into is 50++ yrs old and may not have ever been looked at since new.

Before reassembly:

Look into EVERYTHING (thank you for this, Lavoy, you saved my butt on a couple of things I wouldn't have done). I found some sort of problem in almost every assembly. Even if it didn't have a problem, It needed to be cleaned. I found dirt/sludge in everything or some times just hardened grease. Clean and relube everything.

I have replaced virtually all of the bolts (with the exception of the rock guard cross bolts) with new grade 8 bolts. Even those that do almost nothing like the bolts on the levers. Put never seize on the threads. All those springs are 50++ too.
All shafts should be cleaned and polished with emery and relubed as needed. Anything with threads should be cleaned and a chaser run on them if possible then lube/anti sieze as needed. Use new nuts and locks on the old parts.
I completely agree with all you said here gus. I've run into the same thing with mine. Every hole needs a tap ran through it. Bolts broke/gone, the list goes on and on. You take something apart and find a few more little pieces/linkages etc. that need taken apart. My satisfaction level when mine is done will be very high though. Your work looks excellent can't wait until there's a finished product. Good Luck
Ben

Great Grandpa's 1960 440ICD 602 blade
Between SN's: 455,633 - 456,801
Currently Rebuilding/Restoring

andregrondin
440 crawler
440 crawler
Posts: 215
Joined: Mon Apr 18, 2011 6:51 am
Location: Granby,Québec, Canada

Post by andregrondin » Fri Dec 09, 2011 8:06 am

Hi !

WOW what a nice refurbishing job ! the whole thing inside out , very well done .

congrats
Dig in boy !!
J-D 350 straight 1966
model # = T4F3D
serial # = 08883T

J-D 690-B 1980
model # = D690B
serial # = 007364T

Mack RB688S 1990 dumper

Post Reply

Who is online

Users browsing this forum: No registered users and 14 guests